As a website owner, security and performance are essential to your online presence. One of the best ways to enhance both is by moving your website to Cloudflare. Cloudflare is a content delivery network (CDN) and security service that improves website performance and provides protection from DDoS attacks, among other benefits.
- Sign Up for Cloudflare
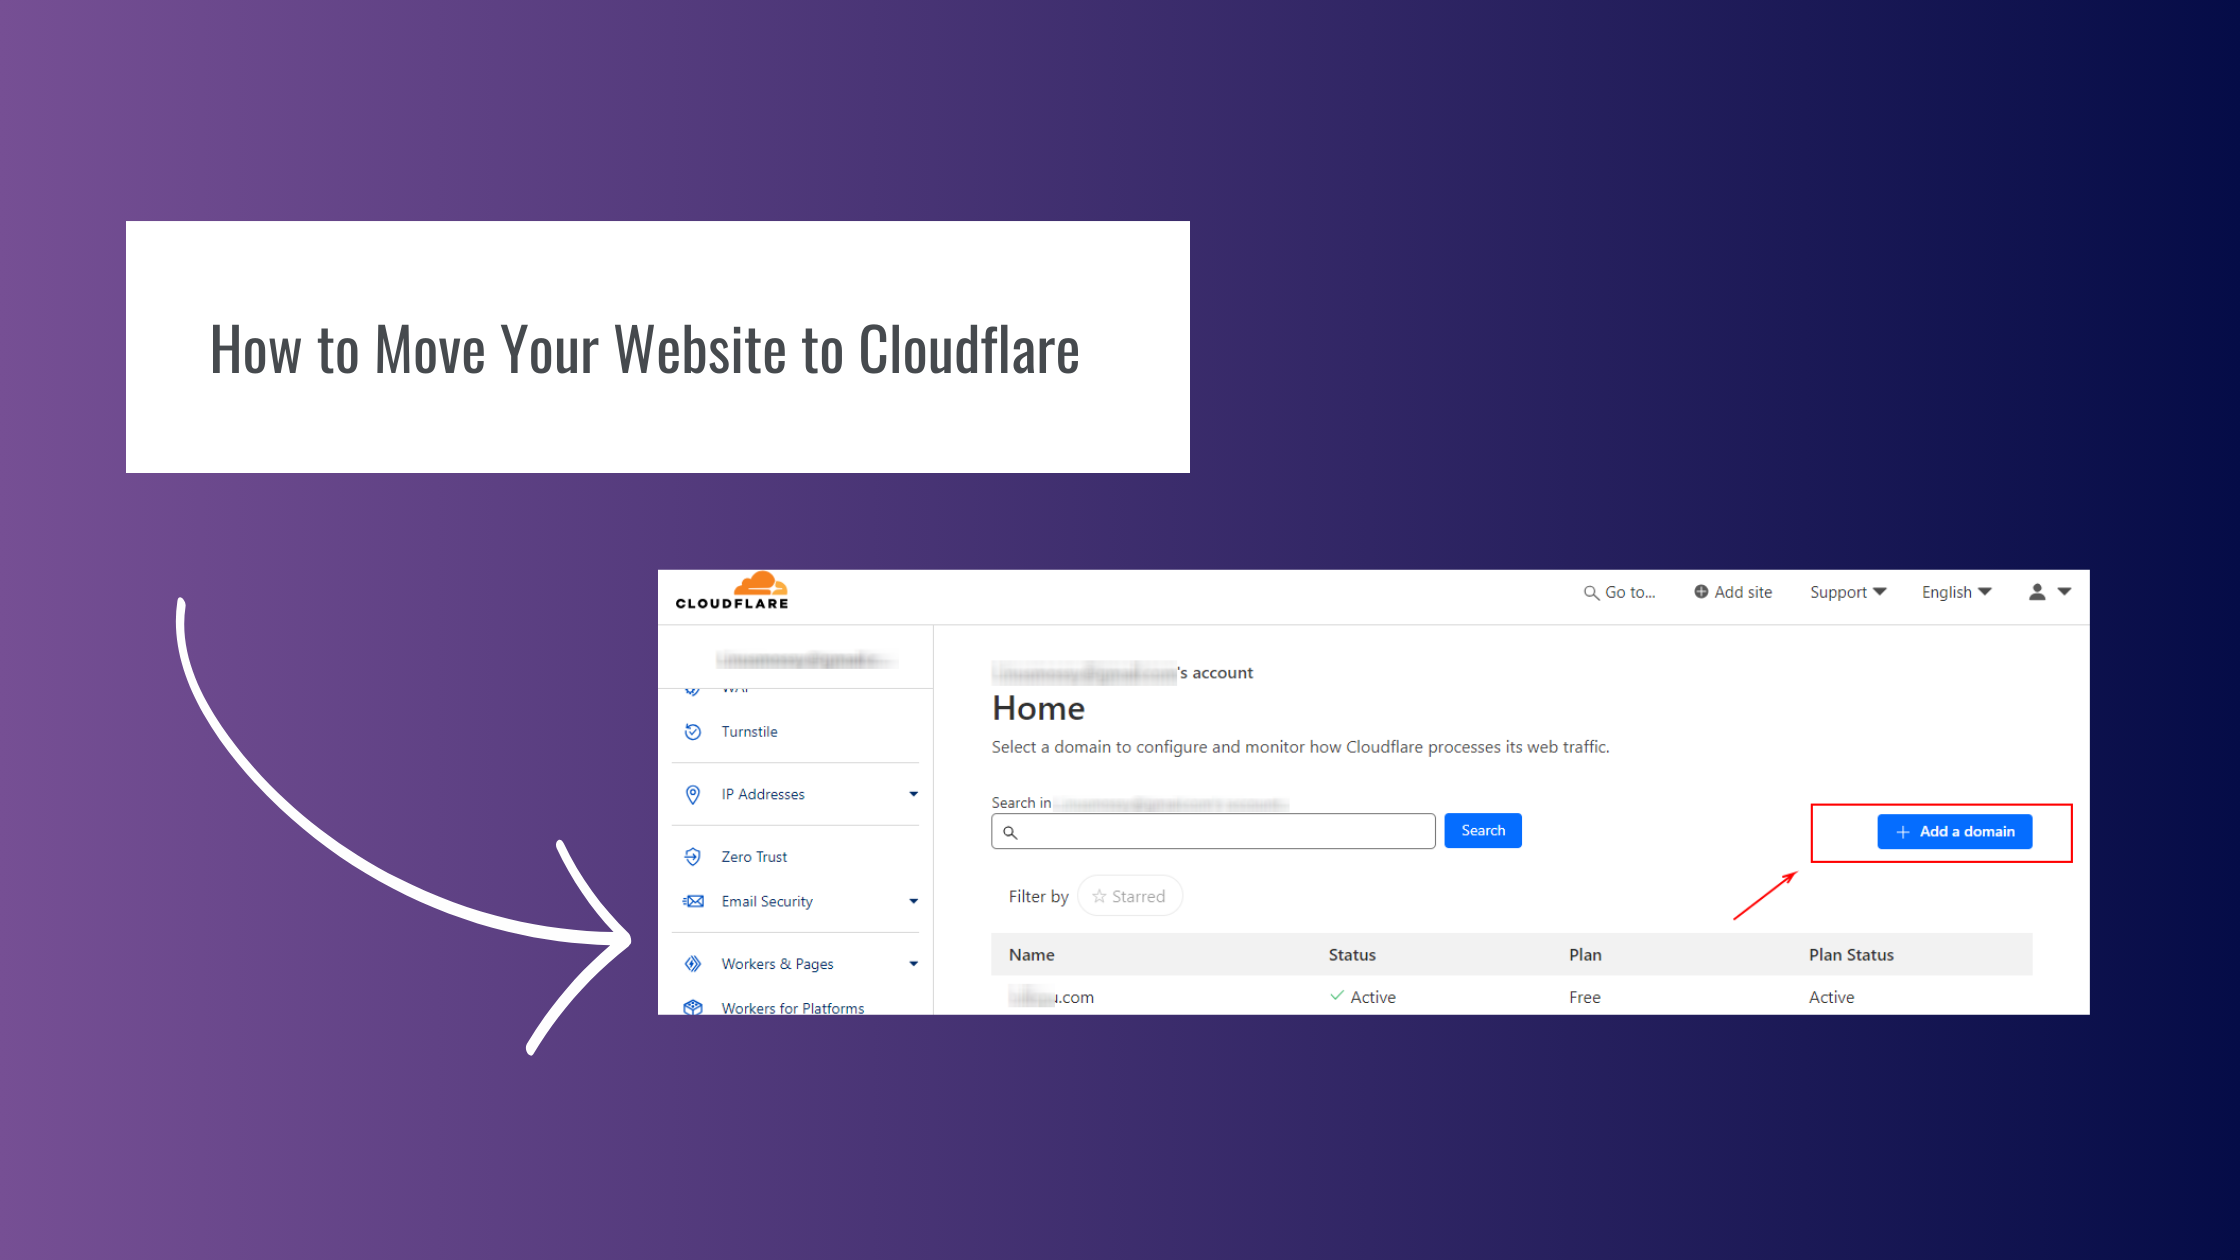
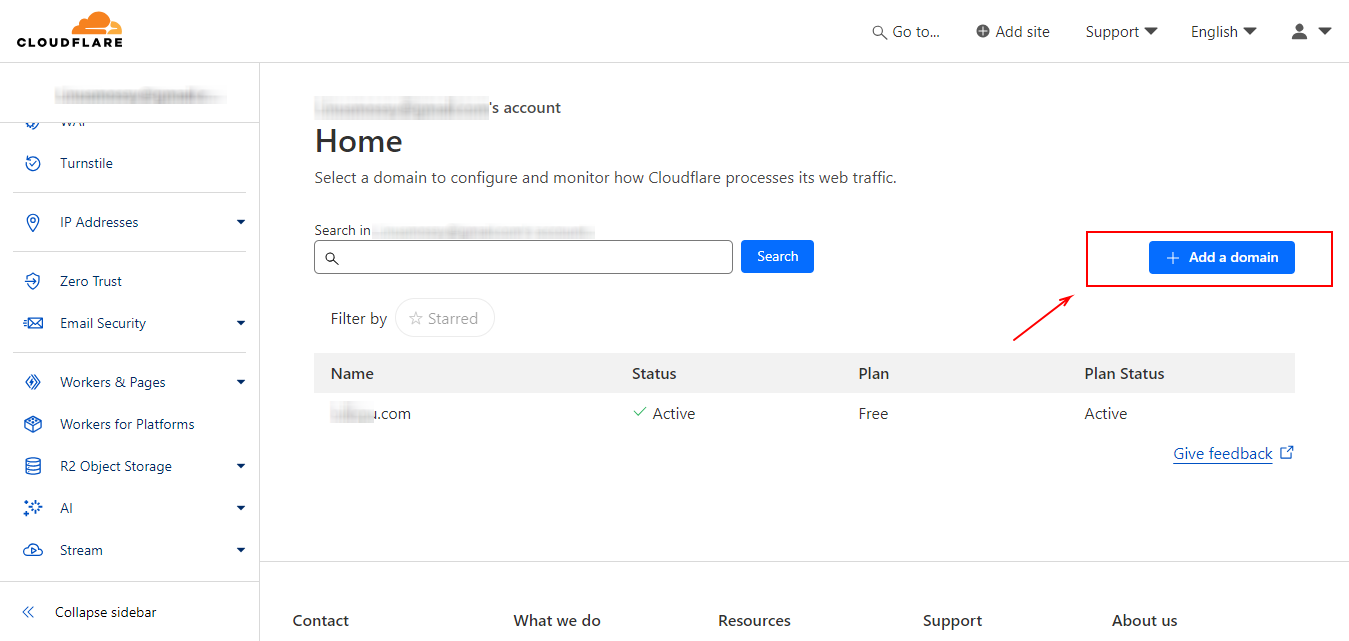
Visit Cloudflare’s website: Go to Cloudflare and create an account. It’s free to sign up, and they offer various tiers depending on your website’s needs.
- Add your website:
After signing up, you’ll be prompted to add your domain. Type your website’s domain (e.g., www.example.com) and click “Add Site.”

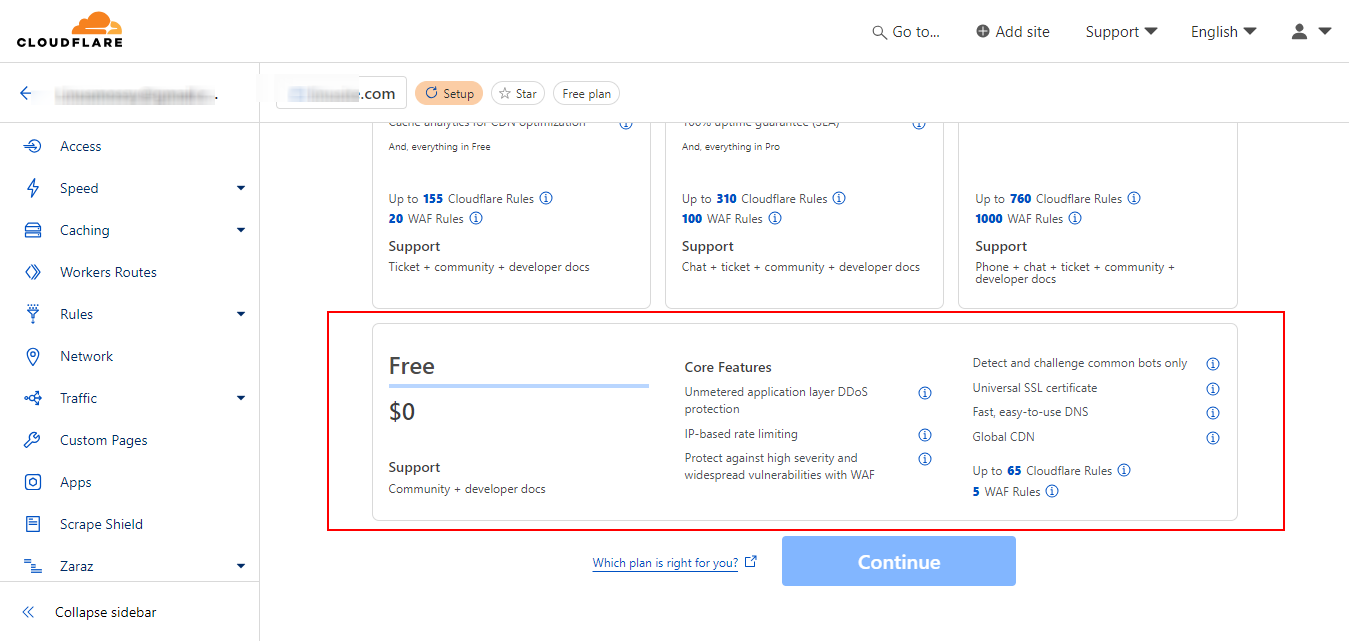
- Select a plan
Cloudflare offers free and paid plans. Choose the plan that best suits your requirements, and then proceed.
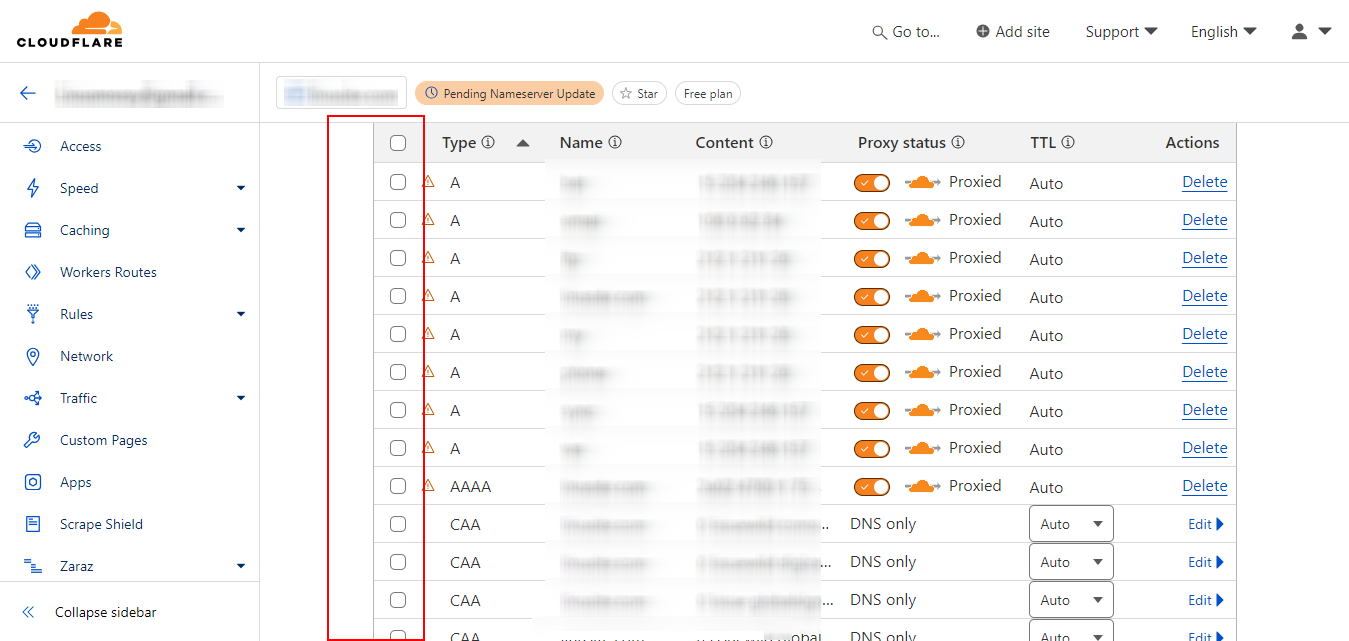
- Scan Your DNS Records
Cloudflare will automatically scan your current DNS records to replicate them. Review the scanned records to make sure they’re accurate. These records help Cloudflare properly route traffic to your site.
A Record: This points your domain to your web hosting server’s IP address.
CNAME Record: Canonical name records alias one domain to another.
MX Record: If you have email hosting set up for your domain, ensure the mail exchange records are correctly listed.
I recommend ticking all records to avoid any disturction - Update Your Name Servers
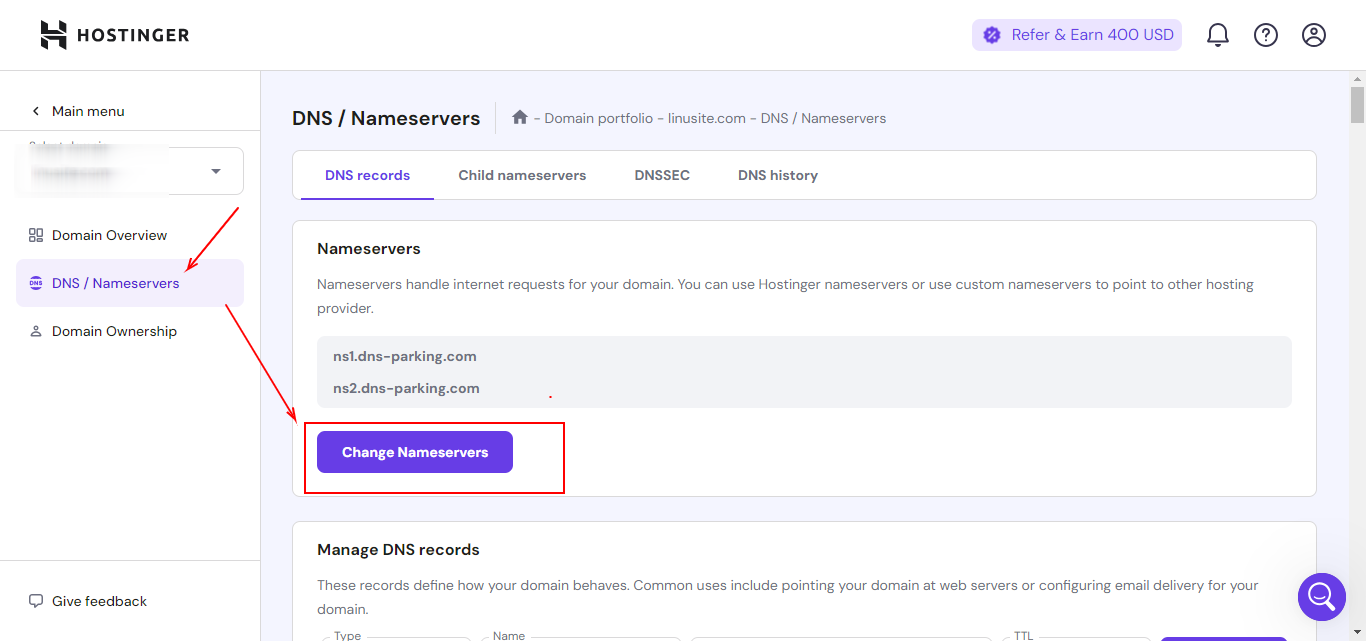
Now that Cloudflare has your DNS settings, it’s time to update your domain’s name servers. Cloudflare will provide you with two name servers, typically something like ns1.cloudflare.com and ns2.cloudflare.com.
At the time of publishing this it was as follow”:
dara.ns.cloudflare.com
kyrie.ns.cloudflare.com
Login to your domain registrar:
This is where you purchased your domain (e.g., GoDaddy, Namecheap, etc.).
Update name servers: Navigate to your domain’s DNS settings, remove the existing name servers, and replace them with the ones provided by Cloudflare.
Save changes: Your DNS propagation will begin, but it may take up to 48 hours for the name server change to fully propagate worldwide.
- Enable Cloudflare Features
Once your site is connected to Cloudflare, you can start enabling the services that will boost performance and security.
SSL Certificate: Cloudflare provides free SSL certificates, which ensure that your website is secure with HTTPS. Activate SSL under the “SSL/TLS” tab, and choose an appropriate mode (Flexible, Full, or Full Strict).
Caching: Cloudflare’s CDN will store cached versions of your site across its global network, significantly speeding up load times for visitors. You can configure caching under the “Caching” tab.
Firewall & Security Settings: Cloudflare has an array of security tools. Under the “Firewall” section, you can configure rules to block malicious traffic or whitelist trusted IPs. DDoS protection is automatically included, helping defend against attacks.
Speed Optimization: Cloudflare also offers various speed enhancements, such as Auto Minify (which reduces file sizes by removing unnecessary characters from HTML, CSS, and JavaScript) and Rocket Loader (which optimizes the loading of JavaScript on your site).
Need Help with Your Cloudflare Setup?
At Linusite, we offer professional website maintenance and optimization services. From moving your website to Cloudflare to ensuring it runs smoothly, we’re your go-to partner for all things web development and digital strategy. Contact us today to get started!